Transition from EPI2ME Agent to EPI2ME Desktop

If you are a user of the legacy EPI2ME Agent for accessing EPI2ME cloud computing functionality, you will have seen the banner stating that:
EPI2ME Agent and Portal will be replaced by a new EPI2ME local and cloud solution.
This blog post aims to provide users with some additional explanation to help with the transition to the new platform. The main differences are:
- a new unified application with an intuitive interface,
- an option to run bioinformatics workflows on your own hardware or in the cloud, and
- updated and improved workflows that use the latest analysis tools and are actively maintained.
Getting started
The EPI2ME Desktop application can be freely downloaded from our Downloads page. The application is rooted in providing a seemless bioinformatics experience on the desktop. It can also branch out and run workflows using our second generation EPI2ME cloud compute environment.
If you need any guidance on the installation, see our installation guide.
Login to the new application is recommended, and it is required for running workflows in the cloud.
After logging in to the application with your Oxford Nanopore Community credentials, you will be guided through any additional setup required. Any time there is an update to the application, you will be prompted to install it within the application itself. On the homepage you will see the dashboard with two top buttons: View workflows and Track analysis. The View workflows button opens a tab listing all installed and available workflows. The Track analyses button opens a tab that contains a history of your workflow runs, similar to the legacy EPI2ME Agent. Below these buttons, you’ll find the Latest updates section, with links to articles from the EPI2ME team including blog posts and how to guides. Differences in how to run a workflow are described below. Whilst the application is designed to be intuitive, if you need any additional guidance on how to install and run a workflow see this tutorial.

Deprecation of EPI2ME Agent and legacy workflows
Although the majority of the pipelines available in the legacy EPI2ME Agent will no longer be supported, they have been superseded by our best-practice workflows which cover the same use cases. These workflows use up-to-date analysis tools, offer comprehensive results and are already being used extensively in the community. They are actively maintained and continuously improved. The new set of workflows make use of the Nextflow workflow manager to improve efficiency and scalability of compute both on local hardware and in the cloud. They employ containerisation technologies such as Docker and Singularity to allow users to run bioinformatics analyses of anything, by anyone, anywhere. All major computing platforms are supported in addition to our own cloud offering.
Running workflows in the new EPI2ME Desktop Application
Each workflow available in the EPI2ME Desktop environment has documentation which provides a detailed explanation of the workflow’s capabilities, how it works and which tools it uses. The documention is available within the application from the Readme tab after opening a workflow. There is also a Use demo data button that downloads an example dataset and runs the workflow in your environment. This is a good way to check that the setup worked and to see what to expect from the results. The demos can be run both on your computer and in the cloud.
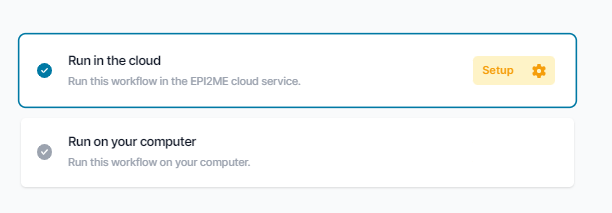
After clicking Run this workflow you will be asked if you want to run it locally or in the cloud. Minimum and recommended compute requirements for running the analysis locally (as well as approximate run times) can be found in the Readme tab. If running in the cloud, you will be prompted to confirm you are not uploading human sequence data which is not yet supported.

Once you have chosen a workflow to run, you will be guided through selecting input data and relevant parameters, with each having a short description and a help text explaining its function in more detail.
Many of the new workflows have more options available than their legacy equivalents. Most of these options are for advanced customisation of the analysis pipeline; the workflows are parameterised with default options that are suitable for standard use cases. In the majority of cases, users need only to provide the required arguments and can leave unchanged all optional parameters. For all required inputs you will be prompted to input a value.
After launching the workflow, you will be able to visualise the progress in the Overview tab. You can also open the Logs tab for further information: it displays the full output from Nextflow.

Once the workflow finishes the generated output files are stored locally automatically even when the workflow is run in the cloud. No separate download step is necessary as was sometimes the case in the legacy platform. You can use the Open folder button to open the output folder or select individual files from the Output listing. The interactive HTML report can be viewed under the Report tab, in addition to being listed as one of the outputs.

WIMP and 16s
For users of the popular What’s In My Pot (WIMP) and 16S workflows, users can transition to the wf-metagenomics and wf-16S workflows respectively. With these workflows you will be able to classify reads and assess species abundances. The main difference is that whilst the previous workflows used the tools Centrifuge and BLAST respectively, the replacement wf-metagenomics and wf-16S workflows both use the more efficient and accurate Kraken2 tool by default. A Minimap2 option available is available also, but is not recommended for use as standard. The workflows can also be used in real-time to classify reads as they become available.
During the EPI2ME Desktop cloud early access period, wf-metagenomics and wf-16S cannot be used in their real-time mode. This caveat does not apply when running the workflows on your own computer.
Unlike the legacy EPI2ME cloud offering, both workflows allow users a choice of databases. They even allow users to provide their own database for custom analyses! For further information on selecting metagenomic databases see our guide here.
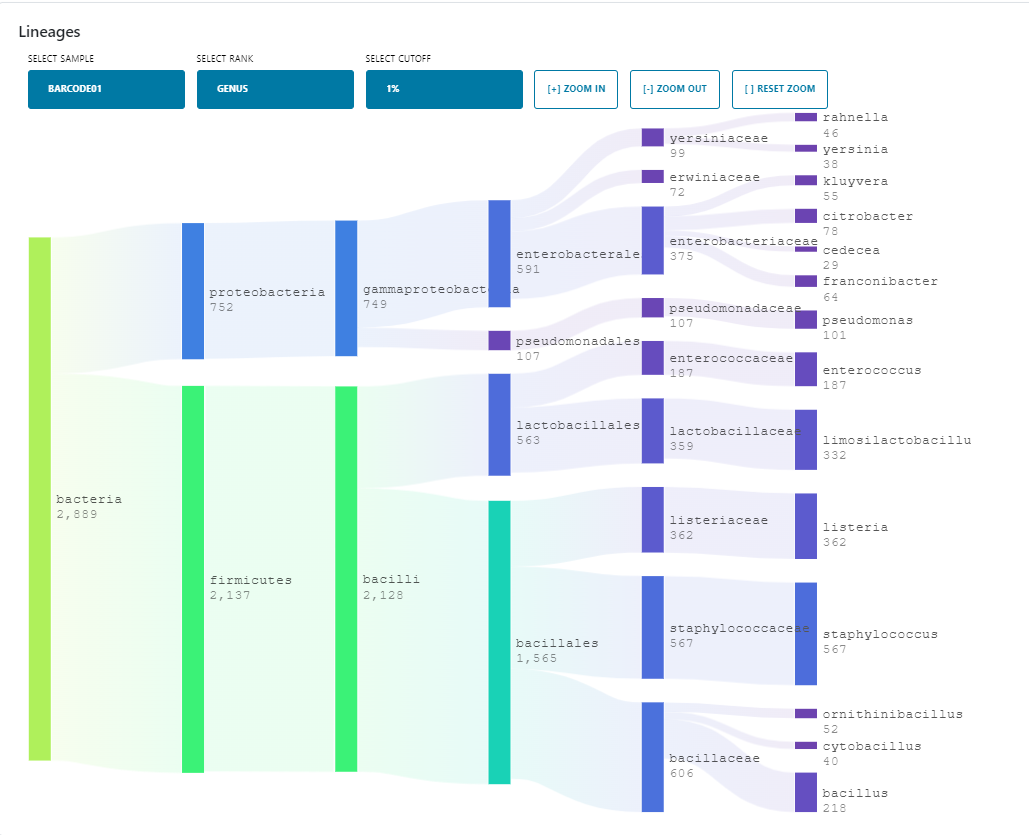
As mentioned above, in addition to the other output files the wf-metagenomics workflow also creates an HTML report containing an interactive Sankey plot and table with taxonomic classifications, as well as a sunburst plot and additional sections on diversity and antimicrobial resistance genes. Please see the documentation for further information.

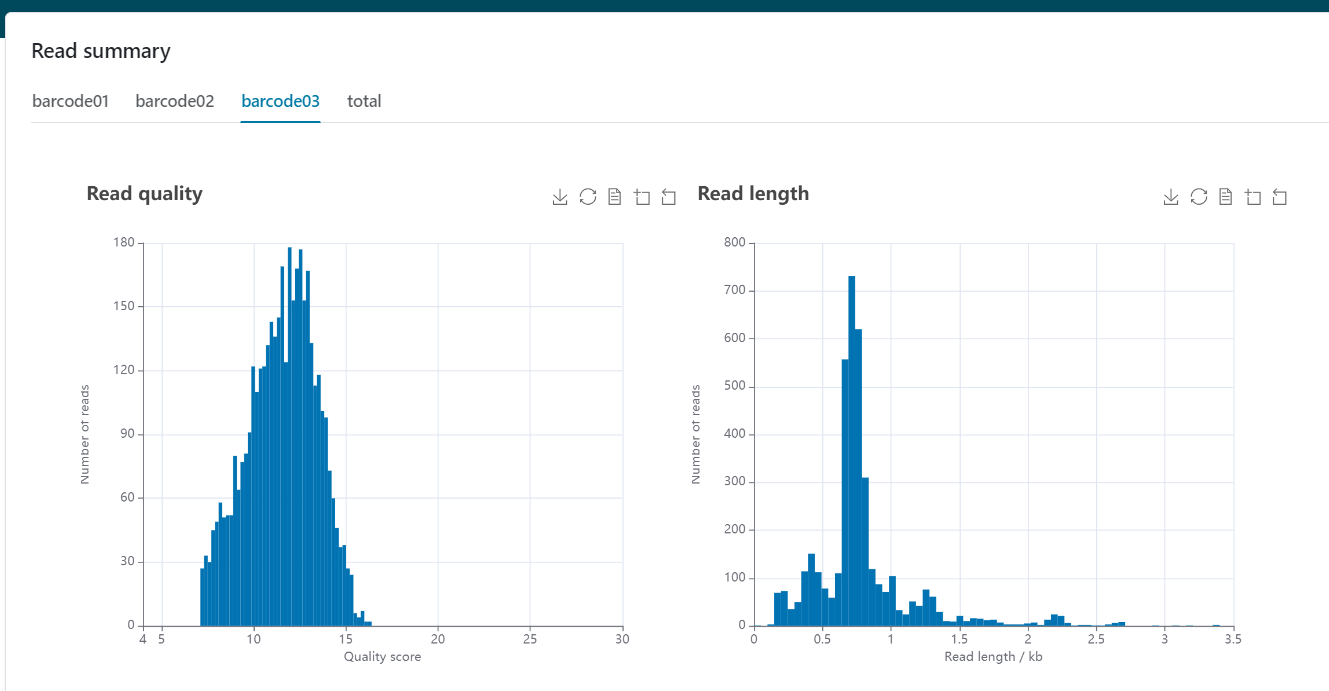
The plots and stats related to read lengths and qualities in the QC tab of the EPI2ME agent can now be found in the read summary section of the reports produced by each workflow.

Legacy workflow alternatives
For all workflows available through the EPI2ME Agent we have developed new alternatives that are fully supported and in active development. Each workflow has associated documentation to help you learn how the workflows functions and what to expect from the outputs. The table below acts as a guide to users to highlight which workflows available in the EPI2ME Desktop product provide equivalent functionality to the legacy cloud product.
| EPI2ME Agent workflow | EPI2ME Workflow |
|---|---|
| Fastq WIMP | wf-metagenomics |
| Fastq 16s | wf-16S |
| Dorado basecalling | wf-basecalling |
| Fastq SV Caller for human | wf-human-variation/wf-somatic-variation |
| Fastq Human exome | wf-amplicon |
| Fastq RNA Control experiment | wf-alignment/wf-transcriptomes |
| Fastq control experiment | wf-alignment |
| Fastq human alignment GRCh38 | wf-alignment |
| Fastq custom alignment | wf-alignment/wf-amplicon |
| Fastq WIMP (Human + Viral) | wf-metagenomics |
| Fastq QC + ARTIC + NextClade | wf-artic |
| Fastq clone validation | wf-clone-validation |
| Fastq antimicrobial resistance | wf-bacterial-genomes/wf-metagenomics |
Reporting issues
If you find anything you require is missing within the EPI2ME Desktop product, or need further guidance, please let us know. If you encounter an error whilst running a workflow, you can use the Report issue option in the workflow overview page. If you have any questions or other issues whilst transitioning to the new application, please reach out to us via support@nanoporetech.com or on github.

